
A turtle’s shell is a living part of its body that requires regular cleaning and care to stay healthy. Without a proper cleaning routine, shells can develop fungal infections, bacteria growth, algae buildup, rotting, and other issues.

This article will provide a step-by-step guide on how to fully clean your turtle’s shell using proper tools and methods. You’ll also learn how to create an optimal habitat layout to prevent future shell contaminations between cleanings.
With some simple but vital cleaning best practices, you can help ensure your turtle friend wears a smooth, sturdy shell for years to come!
How to Clean Your Turtle’s Shell?
Cleaning your turtle’s shell regularly is vital to their health and longevity. Start by gathering mild soap, a soft brush, and lukewarm water.
Gently scrub the entire shell, paying close attention to ridges and folds where debris collects. Rinse thoroughly until the water runs clear.
Finally, dry completely and return them to a clean habitat optimized to prevent future shell contamination between cleanings. With basic but careful cleaning, you can maintain a nice healthy shell.
Why Should You Regularly Clean Your Turtle’s Shell?
A turtle’s shell is its primary defense against predators and the outside environment. However, it is also vulnerable to various contaminants. Here are some key reasons why regular shell cleaning is vital:
- Prevent Infection & Illness: Bacteria, fungi, and algae can grow on the shell, leading to shell rot or respiratory infections if the contagions spread internally.
- Improve Appearance & Health: Cleaning removes waste, uneaten food, and shedding scutes for better aesthetics and health.
- Increase Mobility: A heavy buildup of algae or waste on the upper shell can throw off the turtle’s balance and restrict movement.
- Reduce Unpleasant Odors: A clean turtle and habitat means no stinky turtle smells!
So in short – keeping your shelled friend’s “home” clean keeps them happy and healthy inside and out!
What You Need To Clean a Turtle Shell?
Gather this cleaning toolkit before getting started:
- Soft-bristled toothbrush, rag, or sponge
- Mild, unscented soap (dish soap or pet shampoo works)
- Lukewarm water
- Unused soft-bristled toothbrush
- Hydrogen peroxide and water solution (1 part peroxide to 4 parts water)
- Non-abrasive scrub pads or terry cloth towel
- Oil-free human nail brush (for stubborn waste buildup)
- Optional: Unflavored Pedialyte (to hydrate afterward)
Safety Tip: Avoid hard scrub brushes, chemicals like bleach, and very hot water as these can damage the shell over time.
Step-By-Step Instructions:
Follow this methodical process for shell cleaning success:
Step 1: Set Up

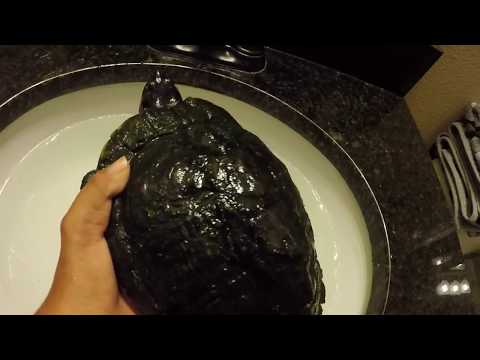
Pick a dry, warm area like a bathroom or kitchen to clean the shell. Have clean water in a sink or tub for rinsing. Place a towel down for traction.
Gently place the turtle upside down lengthwise onto the towel, taking care to support the shell. The turtle may extend its limbs and head – this is normal. Avoid forcefully grabbing the shell.
Note: Only flip small turtles onto their backs this way. Larger turtles can experience breathing issues or stress in this position. Instead, clean larger shells section-by-section.
Step 2: Rinse Away Debris
Use lukewarm water to wet the top and bottom of the shell. Then, use your fingers, a soft rag, or toothbrush to gently rub away any stuck-on debris, waste, or food. Rinse continually while rubbing.
Be thorough around skin folds and the shell’s ridges and edges where gunk loves to hide. Rinse until the water runs clear.
Step 3: Wash With Soap
Work up a lather with a mild soap like diluted dish detergent or pet shampoo. Gently scrub the entire shell surface in circular motions using a soft brush or sponge. Pay extra attention to textured areas and skin folds.
Rinse all soap residue away after scrubbing each section before moving to the next area. Be careful not to let soap get into the eyes.
Step 4: Inspect & Spot Clean
Visually inspect the whole shell and use a fingernail or nail brush to pick away any lingering waste caught in grooves or corners.
For tougher gunk, make a gentle hydrogen peroxide/water solution. Dip the scrub brush into this solution and spot clean.
Check skin folds for reddness, foul odors, or white spots which indicate infection. Seek veterinary care if these symptoms are severe.
Step 5: Final Rinse & Dry
Rinse top and bottom of shell until water sheets off the surface cleanly. Remove excess moisture by patting with a towel.
Air drying works best, so have your turtle walk around on the towel before returning them to their habitat. Their movement helps water evaporate faster than rubbing alone.
Monitor the shell for several days after cleaning to ensure it remains clean and healthy. Repeat the cleaning weekly or monthly as needed.
What Cleaning Products and Tools to Avoid
It’s vital to know what NOT to use when cleaning your turtle’s shell, like:
- Abrasive scrub brushes or scouring pads
- Household cleaners like bleach, disinfectants, or degreasers
- Hot or extremely cold water
- Wire brushes or steel wool pads
These items can critically damage the shell over time by eroding its scutes. The shell has a protective coating that harsh chemicals can strip away. Extreme hot or cold water stresses out the turtle too.
Also, skip the turtle wax! Wax or polish products cause more harm than good despite marketing claims. The shell’s natural oils offer sufficient protection when kept clean.
Signs of a Healthy Turtle Shell
How do you know if your cleaning routine is working or if trouble is brewing? Look for these signs of good turtle shell health:
- Smooth Texture: Healthy shells feel smooth and solid, not soft or powdery
- Shiny Appearance: Clean shells sport a vibrant, glossy sheen without looking wet
- Even Color: The shell has a consistent earthy tone without odd colored splotches
- Firm Scutes: Shell segments, called scutes, are tightly attached without cracks or lifts
Troubleshooting Common Turtle Shell Issues
Sometimes even the best shell cleaning regimen can’t stop problems from popping up. Refer to this troubleshooting guide if you spot any abnormalities:
| Issue | Signs | Treatment |
|---|---|---|
| Scruffy Scutes | Rough, flaking, or peeling scutes | Consult an exotic vet; may need antibiotic ointment |
| Discolored Spots | Unusual white/black/green spots | Treat with antibacterial/antifungal meds from the vet |
| Odor & Shell Rot | A “rotten” smell with shell pitting/lesions | Needs antibiotic injection or topical antibiotic treatment |
| Algae Overload | Green or brown buildup, especially on the carapace (top shell) | Remove algae then adjust habitat cleaning routine |
When in doubt, call your exotic veterinarian for shell anomalies needing medical intervention. Catching issues early vastly improves treatment success.
Habitat Modifications For A Cleaner Shell
Prevention is the best medicine for keeping turtle shells spiffy between scrub sessions. Optimizing the habitat layout can reduce shell contamination risks:
- Use Soft Substrates: Avoid litter with sharp edges like crushed walnut, corn cob, clay, or aquarium gravel that can scrape the plastron (bottom shell) when the turtle digs. Opt for a very fine, smooth substrate instead (like play sand) or soft mats.
- Gravel-Free Water Zone: Any aquarium or pond gravel allows fungus, bacteria, and algae to rapidly spread to a swimming turtle’s underside shell. Create a gravel-free water section.
- Reduce Feed Mess: Feeding reptiles in a separate container prevents excess food, feces, and urates from soiling their water. This goes for aquatic and land turtles alike.
- Adjust Land Basking: Ensure adequate heat and UVA/UVB lighting reach the turtle’s carapace during land basking periods to inhibit algae or fungal blooms.
- Clean Filter Media: If using aquarium tank filters, routinely clean filter media to avoid blowing shell contaminants around the habitat.
By tailoring the habitat layout to the turtle’s needs, their shell stays cleaner between scrubs!
Conclusion
While turtle shells sport built-in protection, these essential body parts still need your help to deflect infection risks!
By adopting a deliberate shell cleaning routine using proper tools and methods, you greatly benefit your turtle’s longevity and quality of life. Partner these cleaning best practices with good habitat maintenance, and your turtle will wear a smooth, sturdy shell for years to come!
Remember to consult an exotic veterinarian if unusual shell changes emerge and adjust cleaning efforts based on seasonal shedding cycles or activity levels.
Every turtle and habitat has unique needs, so a flexible approach ensures excellent shell health. With a little observation and TLC, you’ll have the cleanest turtle shell on the block!
1 thought on “How to Clean Your Turtle’s Shell? (A Step-By-Step Guide)”